Block Ads (Google Ads & Other 3rd Party)

Block Ads (Google Ads & Other 3rd Party)


 Hello Friends, After a long time I created a post that's too much helpful to you.

I noticed many websites and apps shows too many ads like e.g.:- Google Ads & Other 3rd party ads. These ads irritate us and consume our too much mobile data because many advertising providers show Reward Video Ads.


Can we get rid from these ads?

Yes, We can get rid from these ads by using Private DNS.

What is Private DNS?

Private DNS is also a great alternate to get rid of annoying advertisement, online tracking, protect your data from piracy. Private DNS on Android uses the TLS protocol, such as HTTPS. The encryption provided by Transport Layer Security (TLS) eliminates opportunities for eavesdropping and tampering with DNS queries on the network.

With the Private DNS option, you can set a DNS server for all of your Wi-Fi and Mobile networks in one place rather than changing it one by one for each.


How to Setup Private DNS?

Steps to Setup Private DNS.

  • Go to Settings.
  • Select Connection & Sharing.
  • Select Private DNS.
  • Then Choose Designated DNS.
  • And Enter dns.adguard.com
  • Then Save it. 
  • Enjoy Ad free Web Browsing.


How to add Auto Source link

How to add Auto Source link


Hello friends, I noticed on Internet many people (blogger/webmaster) copy content from another website and publish on their blogs/websites.

If a blogger/webmaster copy your content then automatically a source link is also copied with this text. I know this method is too old but I'm facing this problem because too many blogger copy text from my another blog.

How to Add Automatic Source Code Link?

  • Go to Blogger.
  • Click on Themes.
  • Click on Edit HTML.
  • Find </body>.
  • Paste the code before </body>.

<script type='text/javascript'>
//<![CDATA[
!function(e,t)
{var n="getSelection",o="removeAllRanges",i="addRange",l="parentNode",a="firstChild",d="appendChild",r="removeChild",s="test",c="innerHTML";if(e[n])
{var p,g,f,h,u,y;t.addEventListener("copy",function(C){for(g=C.target;3===g.nodeType;)g=g[l];
if(h=t.createElement("div"),(p=e[n]())&&p.rangeCount&&(p=p.getRangeAt(0))&&(f=p.cloneRange(),p=p.cloneContents())){for(;u=p[a];)h[d](u);if(!/^(pre|code)$/i[s](g.nodeName||"")&&!/(^|\s)no-attribution(\s|$)/i[s](g.className||""))
{var v=e.location.href;h[c]+="<br><br>&copy; "+t.title+'<br>Source: <a href="'+v+'">'+v+"</a>"}
y=t.createRange(),t.body[d](h),y.selectNodeContents(h),p=e[n](),p[o](),p[i](y),setTimeout(function()
{h[l][r](h),p[o](),p[i](f)})}},!1)}}(window,document);
//]]>
</script>
  
Live Preview
See it live with all the features that exist, both on the homepage and the page posts.


Footer Credit EditedWith All featuresRemoved Redirect JavaScriptFor Unlimited DomainsUnlimited Page NumberedAnd Many More...
Alternate for Google Photos with Unlimited Backup

Alternate for Google Photos with Unlimited Backup

Alternate for Google Photos with Unlimited space Backup

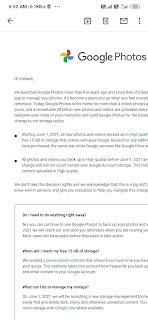
 Hello Everyone, After a long time a create a new post. In this post i tell Alternate for Google Photos with Unlimited Backup(in high quality). Because Recently Google photos changed their policy regarding storage use. Then, After 1June,2021 you can use only 15GB free space on Google account.

Also Check:- Invert Pro Latest Version Blogger Template Download Free (Premium Version) 


Screenshot regarding policy change

What is alternate for Google photos with unlimited backup storage ?

Here I suggest about Yandex Disk because this app provides unlimited space for backup(only in high quality not in original quality). 


What is Yandex Disk (About Yandex Disk) ?

Yandex.Disk is a free cloud storage service that gives you access to your photos, videos and documents from any internet-enabled device. Download the app to your phone or tablet and you'll literally be able to carry your files with you everywhere.

Yandex Disk Features:-

  • Transfer data from your cell phone to computer and back again, all you need is an internet connection.
  • Your files will be completely safe on Disk, even if your mobile or tablet gets lost or broken.
  • To share a file or folder, simply send a link to it and save on mobile data charges.
  • Photos taken through the app will be instantly available on all your other devices.
  • Inbuilt Fingerprint/PIN lock.
  • And much more.

Disadvantages of Yandex Disk:-

  • Annoying Ads(but in limit).
  • Only 10GB on Disk for free(High Quality Photos). But it's not enough.

For Use Yandex Disk you should have Yandex Account.

Screenshot of Yandex Disk


About Yandex Company:-

Yandex is a Russian company. And it's fully secure. Yandex have their own search engine like Google. Know more about Yandex Click Here.


Generating Download Page
Voice To Text converter (HTML/JavaScript)

Voice To Text converter (HTML/JavaScript)

Create Voice To Text converter with HTML and JavaScript
Hello friends, Today i'm sharing "How to create Voice To Text converter with HTML and JavaScript?"
If you are a webmaster or blogger then you can create this tool on your website/blog.
For create voice to text converter, create a new page and follow this tutorial.


  • Create a plain html page or for blogger create a new page.
  • Add HTML for this tool.

<div class="words" contenteditable>
</div>


  • After HTML add CSS for this tool.
<style>@import url("https://fonts.googleapis.com/css?family=Open+Sans");

html {
  font-size: 10px;
}

body {
  background: #fce6d3;
  font-family: "Open Sans", sans-serif;
  font-size: 2rem;
  color: #1d2e4b;
}

.words {
  max-width: 500px;
  margin: 50px auto;
  background: #fff;
  border-radius: 5px;
  padding: 1rem 2rem 1rem 5rem;
  background: -webkit-gradient(linear, 0 0, 0 100%, from(#cfddf9), color-stop(4%, #fff)) 0 4px;
  background-size: 100% 3rem;
  position: relative;
  line-height: 3rem;
  -moz-box-shadow: 2px 8px 15px rgba(228, 126, 118, 0.5);
  -webkit-box-shadow: 2px 8px 15px rgba(228, 126, 118, 0.5);
  box-shadow: 2px 8px 15px rgba(228, 126, 118, 0.5);
}

p {
  margin: 0 0 3rem;
}

.words:before {
  content: "";
  position: absolute;
  width: 4px;
  top: 0;
  left: 30px;
  bottom: 0;
  border: 1px solid;
  border-color: transparent #ffd9d9;
}</style>


  • Add JavaScript code for this tool
<script>
window.SpeechRecognition = window.SpeechRecognition || window.webkitSpeechRecognition;

if (!window.SpeechRecognition) {
  alert("Your browser does not support speech recognition. Use Chrome!")
}

const recognition = new SpeechRecognition();
recognition.interimResults = true;

let p = document.createElement('p');
const words = document.querySelector('.words');
words.appendChild(p);

recognition.addEventListener('result', e => {
  const transcript = Array.from(e.results)
    .map(result => result[0])
    .map(result => result.transcript)
    .join('');

    p.textContent = transcript;

    if(e.results[0].isFinal) {
      p = document.createElement('p');
      words.appendChild(p);
    }

  console.log(transcript);
});


recognition.addEventListener('end', recognition.start);
recognition.start();</script>

  • Now your tool is ready.
YouTube Now Allows You To Watch Videos In 1080p...

YouTube Now Allows You To Watch Videos In 1080p...

YouTube Now Allows You To Watch Videos In 1080p After 4 months ago, YouTube has maid some restrictions on its video streaming services by cutting down the quality to 480p across every network.
And finally, Now Indian's can now watch the videos in 1080p but user's can only watch the videos at 1080p quality only when connected to WiFi network which clearly states that the mobile streaming is still limited to SD quality.

Few users might still cannot be able to watch the videos on high quality as the changes are occurring via a server-side switch rather than an app update. And it's clear that all the YouTube user's can watch the videos on high quality and this is not limited to premium user's of YouTube. We might see few more changes in upcoming weeks which might also bring better quality of video for mobile streaming as per experts.

Now, Depending upon the quality of a video, user's will now able to see higher quality settings which features 144p, 240p, 360p, 480, 720p, and 1080p which were removed in recent months due to COVID-19 pandemic lockdown globally in many countries to save bandwidth. As seen in the image above, now you can toggle between your desired video quality from HD, full-HD, and also in higher quality by connecting to WiFi network, but once you switch to mobile data the quality of video will automatically change to 480p only decreasing the quality of video and limiting it to SD again.

Add a Cookie Notice for Privacy Policy Agreement

Add a Cookie Notice for Privacy Policy Agreement

How to add a Cookie Notice for Privacy Policy Agreement [Blogger/Website]

Why Cookies notification Required for blogger/website.

European Union (EU) laws require you to give EU visitors information about cookies used on your blog. In many cases, these laws also require you to obtain consent.

As a courtesy, Google added the following notice on your blog to help meet these regulations:

"This site uses cookies from Google to deliver its services and analyze traffic. Your IP address and user-agent are shared with Google along with performance and security metrics to ensure quality of service, generate usage statistics, and to detect and address abuse."

The notice lets visitors know about Google's use of certain Blogger and Google cookies on your blog, including Google Analytics and AdSense cookies.

Cookies and Cookie Types:-

Cookies can be classified into different types based on different characteristics. 
  • Based on their purpose, there are basically two types of cookies, necessary and non-necessary. The necessary cookies are the ones that are essential for the functioning of a website, and the non-necessary cookies are the ones that are added additionally by the website and are not really important for the functioning of the website.    
  • Based on their origin, cookies can be divided into first-party and third-party cookies. First-party cookies are set by the website itself that the user is currently visiting, say, check whether the user is logged in or not. Whereas third-party cookies are put in by other websites that track the user for targeting relevant advertisements.
  • Based on their duration, cookies can be divided into two, persistent and session cookies. Session cookies are set when the user starts a session and are temporary cookies. They expire once the browser is closed and the session ends. Persistent cookies, on the other hand, stay on the user’s browser for a longer period and only die when they reach their expiration period.

Adding a Cookie Banner Agreement:-

Blogger is a popular platform/website to create your blog in free. To add a cookie banner that is GDPR compliant on your Blogger or Blogspot website, you can use this Tutorial.

Steps To Add Cookie Notice:-

  1. Go to  Blogger.
  2. Now Go to Theme option.
  3. Click on Edit HTML.
  4. Now Paste this CSS code after tag.

    
    <style> .cc-window{opacity:1;transition:opacity 1s ease}
    .cc-window.cc-invisible{opacity:0}.cc-animate.cc-revoke{transition:transform 1s ease}
    .cc-animate.cc-revoke.cc-top{transform:translateY(-2em)}
    .cc-animate.cc-revoke.cc-bottom{transform:translateY(2em)}
    .cc-animate.cc-revoke.cc-active.cc-bottom,.cc-animate.cc-revoke.cc-active.cc-top,.cc-revoke:hover{transform:translateY(0)}.cc-grower{max-height:0;overflow:hidden;transition:max-height 1s}
    .cc-link,.cc-revoke:hover{text-decoration:underline}
    .cc-revoke,.cc-window{position:fixed;overflow:hidden;box-sizing:border-box;font-family:Helvetica,Calibri,Arial,sans-serif;font-size:16px;line-height:1.5em;display:-ms-flexbox;display:flex;-ms-flex-wrap:nowrap;flex-wrap:nowrap;z-index:9999}
    .cc-window.cc-static{position:static}
    .cc-window.cc-floating{padding:2em;max-width:24em;-ms-flex-direction:column;flex-direction:column}.cc-window.cc-banner{padding:1em 1.8em;width:100%;-ms-flex-direction:row;flex-direction:row}.cc-revoke{padding:.5em}
    .cc-header{font-size:18px;font-weight:700}.cc-btn,.cc-close,.cc-link,.cc-revoke{cursor:pointer}.cc-link{opacity:.8;display:inline-block;padding:.2em}.cc-link:hover{opacity:1}
    .cc-link:active,.cc-link:visited{color:initial}.cc-btn{display:block;padding:.4em .8em;font-size:.9em;font-weight:700;border-width:2px;border-style:solid;text-align:center;white-space:nowrap}
    .cc-banner .cc-btn:last-child{min-width:140px}.cc-highlight .cc-btn:first-child{background-color:transparent;border-color:transparent}.cc-highlight .cc-btn:first-child:focus,.cc-highlight .cc-btn:first-child:hover{background-color:transparent;text-decoration:underline}
    .cc-close{display:block;position:absolute;top:.5em;right:.5em;font-size:1.6em;opacity:.9;line-height:.75}.cc-close:focus,.cc-close:hover{opacity:1}.cc-revoke.cc-top{top:0;left:3em;border-bottom-left-radius:.5em;border-bottom-right-radius:.5em}.cc-revoke.cc-bottom{bottom:0;left:3em;border-top-left-radius:.5em;border-top-right-radius:.5em}.cc-revoke.cc-left{left:3em;right:unset}
    .cc-revoke.cc-right{right:3em;left:unset}
    .cc-top{top:1em}.cc-left{left:1em}.cc-right{right:1em}
    .cc-bottom{bottom:1em}.cc-floating>.cc-link{margin-bottom:1em}.cc-floating .cc-message{display:block;margin-bottom:1em}.cc-window.cc-floating .cc-compliance{-ms-flex:1;flex:1}
    .cc-window.cc-banner{-ms-flex-align:center;align-items:center}.cc-banner.cc-top{left:0;right:0;top:0}.cc-banner.cc-bottom{left:0;right:0;bottom:0}.cc-banner .cc-message{-ms-flex:1;flex:1}
    .cc-compliance{display:-ms-flexbox;display:flex;-ms-flex-align:center;align-items:center;-ms-flex-line-pack:justify;align-content:space-between}.cc-compliance>.cc-btn{-ms-flex:1;flex:1}
    .cc-btn+.cc-btn{margin-left:.5em}@media print{.cc-revoke,.cc-window{display:none}}@media screen and (max-width:900px){.cc-btn{white-space:normal}}@media screen and (max-width:414px) and (orientation:portrait),screen and (max-width:736px) and (orientation:landscape){.cc-window.cc-top{top:0}.cc-window.cc-bottom{bottom:0}
    .cc-window.cc-banner,.cc-window.cc-left,.cc-window.cc-right{left:0;right:0}
    .cc-window.cc-banner{-ms-flex-direction:column;flex-direction:column}.cc-window.cc-banner .cc-compliance{-ms-flex:1;flex:1}.cc-window.cc-floating{max-width:none}.cc-window .cc-message{margin-bottom:1em}
    .cc-window.cc-banner{-ms-flex-align:unset;align-items:unset}}.cc-floating.cc-theme-classic{padding:1.2em;border-radius:5px}.cc-floating.cc-type-info.cc-theme-classic .cc-compliance{text-align:center;display:inline;-ms-flex:none;flex:none}.cc-theme-classic .cc-btn{border-radius:5px}.cc-theme-classic .cc-btn:last-child{min-width:140px}.cc-floating.cc-type-info.cc-theme-classic .cc-btn{display:inline-block}.cc-theme-edgeless.cc-window{padding:0}
    .cc-floating.cc-theme-edgeless .cc-message{margin:2em 2em 1.5em}.cc-banner.cc-theme-edgeless .cc-btn{margin:0;padding:.8em 1.8em;height:100%}.cc-banner.cc-theme-edgeless .cc-message{margin-left:1em}
    .cc-floating.cc-theme-edgeless .cc-btn+.cc-btn{margin-left:0} #cookieChoiceInfo {display:none} .cc_container {box-shadow: none; border: 1px soild #ddd; border-radius: 0;} .cc_container .cc_btn:hover, .cc_container .cc_btn:active {background: #999; color: #fff;}
     .cc_container .cc_btn, .cc_container .cc_btn:visited {background: #000 !important; color: #fff !important; border-radius: 2px !important;} 
    </style> 


  •  Paste this JavaScript code after this CSS code.


  • 
    <script src="https://cdnjs.cloudflare.com/ajax/libs/cookieconsent2/3.0.6/cookieconsent.min.js">
    </script>
    

    Paste this Javascript code after </body>.

    
    <script>
        // EU Law Cookies
    
    window.addEventListener("load", function()
    { window.cookieconsent.initialise
    ({ "palette": { "popup": { "background": "#eb6c44", "text": "#ffffff" }, "button": { "background": "#f5d948", "text": "#fff" } }, "position": "bottom-center", "content": 
    { "message": "This site uses cookies from Google to deliver its services, to personalise ads and to analyse traffic. By using this site, you agree to its use of cookies.", "dismiss": "OK", "href": "https://visheshgrewal.blogspot.com/p/privacy-policy.html", } })});
    
      </script>
    
    Data Vocabulary Schema Deprecated Breadcrumbs error Fix in blogger

    Data Vocabulary Schema Deprecated Breadcrumbs error Fix in blogger

    Data Vocabulary Schema Deprecated Breadcrumbs error Fix in blogger by Vishesh Grewal

    Importance of Breadcrumbs

    Why is it important to have valid breadcrumb structured data markup?
    Google Search uses breadcrumb markup in the body of a web page to categorize the information from the page in search results. Given the fact that Google is displaying breadcrumbs more prominently in search results, it’s more important than ever to make sure the markup is valid. Breadcrumb markup can be implemented using JSON-LD, RDFa, or Microdata. It can also be implemented as part of a page’s visual design using HTML.

    "How to Fix Breadcrumbs Issue?" 

    • If you get Email from Google mentioning that your posts have breadcrumbs issues.
    • While submitting your post in Google Webmaster tool, you are able to submit the post for indexing, but while testing URL, you get a warning like “Data Vocabulary Schema Deprecated Breadcrumbs error”.
    Don’t worry guys, I found an instant solution for this which is 100% WORKING and TESTED. I found this solution because recently i also get a email from "Google Search Console" related Breadcrumbs issue on my Blog.

    Steps To Fix Breadcrumbs Issue:-

    •  Go to your blogger and navigate to “Theme” and click “Edit HTML”.
    • Click anywhere in the HTML code window of your blogger theme and search for “.breadcrumbs a:hover” OR “.breadcrumbs span a:hover”. You will definitely find either of these two.
    • Paste this code.
    
    .breadcrumbs svg{width:16px;height:16px;vertical-align:-4px}
    
    .breadcrumbs svg path{fill:#666} 


  • After that Search again for below line in blogger theme HTML
  •  <b:includable id='backlinks' 
    • Paste this code.
    <b:includable id='breadcrumb' var='posts'> 
    <b:if cond='data:blog.pageType == &quot;item&quot;'> 
    <b:loop values='data:posts' var='post'> 
    <b:if cond='data:post.labels'> 
    <div class='breadcrumbs' itemscope='itemscope' itemtype='https://schema.org/BreadcrumbList'>
     <svg viewBox='0 0 24 24'>
    <path d='M10,20V14H14V20H19V12H22L12,3L2,12H5V20H10Z' fill='#000000'/></svg> 
    <span itemprop='itemListElement' itemscope='itemscope' itemtype='https://schema.org/ListItem'>
     <a expr:href='data:blog.homepageUrl' title='Home' itemprop='item'> 
    <span itemprop='name'>Home</span></a>
     <meta content='1' itemprop='position'/> </span> 
    <svg viewBox='0 0 24 24'><path d='M5.5,9A1.5,1.5 0 0,0 7,7.5A1.5,1.5 0 0,0 5.5,6A1.5,1.5 0 0,0 4,7.5A1.5,1.5 0 0,0 5.5,9M17.41,11.58C17.77,11.94 18,12.44 18,13C18,13.55 17.78,14.05 17.41,14.41L12.41,19.41C12.05,19.77 11.55,20 11,20C10.45,20 9.95,19.78 9.58,19.41L2.59,12.42C2.22,12.05 2,11.55 2,11V6C2,4.89 2.89,4 4,4H9C9.55,4 10.05,4.22 10.41,4.58L17.41,11.58M13.54,5.71L14.54,4.71L21.41,11.58C21.78,11.94 22,12.45 22,13C22,13.55 21.78,14.05 21.42,14.41L16.04,19.79L15.04,18.79L20.75,13L13.54,5.71Z' fill='#000000'/></svg>
     <b:loop index='num' values='data:post.labels' var='label'> 
    <span itemprop='itemListElement' itemscope='itemscope' itemtype='https://schema.org/ListItem'>
     <a expr:href='data:label.url + &quot;?&amp;max-results=16&quot;' expr:title='data:label.name' itemprop='item'>
     <span itemprop='name'><data:label.name/></span> </a> 
    <meta expr:content='data:num+2' itemprop='position'/> </span> 
    <b:if cond='data:label.isLast != &quot;true&quot;'>
     <svg viewBox='0 0 24 24'><path d='M8.59,16.58L13.17,12L8.59,7.41L10,6L16,12L10,18L8.59,16.58Z' fill='#000000'/></svg> 
    </b:if> 
    </b:loop> 
    <svg viewBox='0 0 24 24'><path d='M8.59,16.58L13.17,12L8.59,7.41L10,6L16,12L10,18L8.59,16.58Z' fill='#000000'/></svg> 
    <span><data:post.title/></span> </div> </b:if> </b:loop> </b:if> </b:includable>
    
    How To Add Custom Robots.txt File in Blogger?

    How To Add Custom Robots.txt File in Blogger?

    How To Add Custom Robots.txt File in Blogger?

    What is Robots.txt?

    Robots.txt is a text file which contains few lines of simple code.
    It is saved on the website or blog's server which instruct the web crawlers on how to index and crawl your blog in the search results.
    That means you can restrict any web page on your blog from web crawlers so that it can't get indexed in search engines like your blog labels page, your demo page or any other pages that are not as important to get indexed.
    Always remember that search crawlers scan the robots.txt file before crawling any web page.
    Each blog hosted on blogger has its default robots.txt file which is something look like this: 

    User-agent: Mediapartners-Google
    Disallow:
    User-agent: *
    Disallow: /search
    Allow: /
    Sitemap: http://example.blogspot.com/sitemap.xml


    Explanation:-

    This code is divided into three sections. Let's first study each of them after that we will learn how to add custom robots.txt file in blogspot blogs.

    User-agent: Mediapartners-Google

    This code is for Google Adsense robots which help them to serve better ads on your blog. Either you are using Google Adsense on your blog or not simply leave it as it is.

    User-agent: * 

    This is for all robots marked with asterisk (*). In default settings our blog's labels links are restricted to indexed by search crawlers that means the web crawlers will not index our labels page links because of below code.

    Disallow: /search

    That means the links having keyword search just after the domain name will be ignored. See below example which is a link of label page named SEO.

    https://visheshgrewal.blogspot.com/search/label/SEO 

    And if we remove Disallow: /search from the above code then crawlers will access our entire blog to index and crawl all of its content and web pages.

    Here Allow: / refers to the Homepage that means web crawlers can crawl and index our blog's homepage.


    Disallow Particular Post

    Now suppose if we want to exclude a particular post from indexing then we can add below lines in the code.

    Disallow: /yyyy/mm/post-url.html

    Here yyyy and mm refers to the publishing year and month of the post respectively. For example if we have published a post in year 2018 in month of March then we have to use below format.

    Disallow: /2018/03/post-url.html

    To make this task easy, you can simply copy the post URL and remove the blog name from the beginning.


    Disallow Particular Page

    If we need to disallow a particular page then we can use the same method as above. Simply copy the page URL and remove blog address from it which will something look like this:

    Disallow: /p/page-url.html


    Adding Custom Robots.Txt to Blogger

    Now the main part of this tutorial is how to add custom robots.txt in blogger. So below are steps to add it.
    • Go to your blogger blog.
    • Navigate to Settings >> Search Preferences ›› Crawlers and indexing ›› Custom robots.txt ›› Edit ›› Yes
    • Now paste your robots.txt file code in the box.
    • Click on Save Changes button.
    • You are done! 


    How to Check Your Robots.txt File? 

    You can check this file on your blog by adding /robots.txt at the end of your blog URL in the web browser. For example:
    http://xyz.blogspot.com/robots.txt

    Once you visit the robots.txt file URL you will see the entire code which you are using in your custom robots.txt file.


    How to Submit your Site on Google Step-by-step Guide

    How to Submit your Site on Google Step-by-step Guide


    For Getting your Site/Blog on Google search, Here you can get step-by-step guide for Submit your Website/Blog on Google. If your website/blog isn't in Google's index, it won't be able to be found when a user makes a search. Google needs to know that your site exists to be able to crawl it and include it in its index.

    You must have a Google Account for submit your site on Google.

    How to Submit your Website/Blog on Google Search?


    1. Go to Google Webmaster Tool.
    2. Click on Menu Bar (if you use mobile version) and then click on +Add Property.
    3. Now Enter your domain name.
    4. Then you need to verify your domain by Adding CNAME record, upload HTML file on your website file manger(Hosting account required) or by Adding a meta head tag on your site/blog.
    5. Then Google verify your domain and starts crawling your site/blog.

    If you facing any error just leave a comment.